Showing posts with label chocolate. Show all posts

Friday, May 17, 2013

Devil's Food Cake with Bittersweet Chocolate Glaze

I have an embarrassing number of cake recipes bookmarked, dog-eared, and stashed in my recipe binder, but I don't actually bake cakes as often as I'd like. Individual treats like cookies and scones are easier to bring to work, which is important because 1) I want my coworkers to like me, and this is the easiest way I know of to win friends, and 2) I tend to forgo meals and subsist entirely on cake when it's in my kitchen.

Still, birthdays are a good excuse to live large, and when mine came around this week, I browsed through my files and, after due consideration, chose the devil's food cake recipe from the Bouchon Bakery cookbook. Because, I mean, chocolate. Seriously. You can't go wrong with a chocolate birthday cake. Especially after a repast of cheese soufflé and shaved fennel salad.

The recipe calls for mayonnaise, which I have never bought in my life because I think mayo is weird. The homemade version is very simple, though it does require a strong whisking arm. Remind me to rope Amaury into making it for me next time.


 The cake recipe is delightfully simple, too. If you have a standing mixer, it'll make your life easier—and if you bake a lot, it is definitely worth the investment—but you can make this with a handheld version, too. Just have a good book to read in your free hand, since you'll be whisking for more than 10 minutes.


Is it really necessary to sift your dry ingredients together? OH, I DON'T KNOW. YOU TELL ME.


If you need some instruction on glazing your masterpiece, here's a video with only slightly ridiculous commentary. I got laryngitis as a birthday gift, so my voice is kinda scratchy.


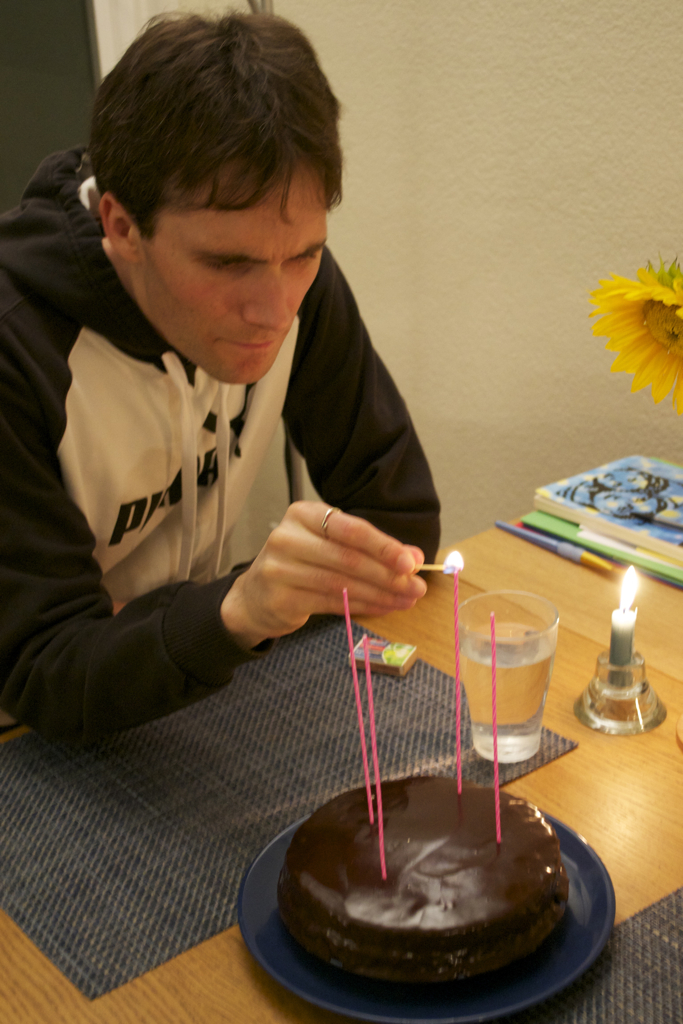
Amaury takes candle lighting very seriously. Such pretty candles!


Recipes for cake, glaze, and mayonnaise below the cut.

Tuesday, March 12, 2013

Recent Eats in Words and Pictures


A friend at the library saw that I had just checked out The Big Sur Bakery Cookbook yesterday. She and I both love to bake, so she asked if I'd made anything good lately. I was embarrassed to reply that, no, I really hadn't. 

Since she told me Big Sur is a fantastic cookbook, I resolved to go home and bake something that very night. I found a recipe for a marmalade tart that seemed like the perfect way to use up a jar of marmalade in the back of the fridge (I don't particularly like marmalade, but I'd needed it for a recipe for Thanksgiving).


 The result: the perfect mix of sour and sweet atop an impressively flaky crust. Recipe available here and here.


I'm working on improving my cake baking skills, so I've recently (ahem, in the last few months) churned out a heart-shaped, flourless chocolate confection from The Smitten Kitchen Cookbook…

Aptly named the "tiny but intense chocolate cake." Need to try my hand at this again to see if I can get it to not collapse.

…and a simple yellow cake from Bouchon Bakery, artistically decorated with strawberry coulis.

To make a strawberry coulis, blend a pint of hulled strawberries (preferably organic) with a spoonful of powdered sugar and a generous squeeze of lemon juice. Drizzle over anything and everything, or eat it straight from the jar.

Still, as much as I might like to eat cakes and tarts and cookies all day long, I've got to sneak in some vegetables somewhere. If you're not sick of eating squash all winter long, might I direct your attention to this 100% vegan, totally healthy, impressively creamy roasted butternut alfredo? 


Just remember to save some room for a slice of cake for dessert.

Tuesday, June 12, 2012

Salt, Caramel, Chocolate


One of the good things about being a chocoholic is that you've always got something in which to drown your sorrows, something to give a bit of comfort when life gets you down. The better the chocolate, the better the mood upswing (though I learned at an early age that one should always keep a bag of chocolate chips in the freezer for emergencies).

I've been trying to juggle too many eggs recently, but indulging in some homemade chocolate cake, chocolate almond bars, or hot cocoa always manages to simultaneously calm me down and lift up my spirits a bit.

Given all this, I felt it was time to share a particularly exciting chocolate recipe I've had in the pipeline for awhile now.

Chocolate. Dipped. Salted. Caramels.


Take a moment to wipe that drool off your keyboard and keep reading.

Now, this probably isn't the best recipe to attempt when you're juggling eggs, but if you've got a weekend afternoon to burn, the results are more than worth the effort.

Don't be scared away if you've never made candy before. I'm not going to go into the intricacies here… these posts already tend toward the long side, and I'm a novice candy maker anyway. I do suggest you crack open Joy of Cooking or another solid cookbook and read the intro section on candy making first. You might also consider starting out with a half batch.

The first thing to do is gather your weaponry:

(As always, click on the image for a larger version)

Rainbow spoons
(Note: these items are just for the caramels; the chocolate dipping part will actually come in a separate post.)

Put your recipe up somewhere visible. Yes, I like to tape mine to the microwave. If you're making a half-recipe (a good idea if this is your first foray into the world of candy making), write out the conversions. Oh, sure, you may think you'll remember to add just one cup of sugar instead of two… but speaking from experience, it's best to err on the side of caution here.


As you stir, it'll go from looking like this smooth concoction:


…to this bubbling brew:


…to this vat of golden, sugary goodness:


You need to stir continuously until it comes to a boil, but after that, just stir occasionally and dick around with your camera in the meantime.


Reminds me rather strongly of the mudpots at Yellowstone...

When your candy thermometer starts getting close to 257˚F, keep a close eye on it and start testing to see if you're at the hard ball stage yet. You may want several small dishes of cold water handy for this.

The gist of the water test is that, as a sugar mixture cooks, the water evaporates (this is not rocket science). Mixtures with higher concentrations of sugar react differently in water, with the chilled product becoming harder and less flexible.

At the hard ball stage, a small amount of sugar syrup dribbled into cold water from a clean, dry spoon (wooden or silicone, not metal) and quickly picked up forms a relatively rigid ball. If it's only at the firm ball stage—about 244˚-248˚F, at which the cooled syrup forms an easily squishable ball—it needs to be cooked longer.

Water test aftermath

Time for a public safety announcement: sugar syrup is really hot. It hurts somewhere between the dickens and the blazes if you get it on your skin, so please be careful. If you do have an incident, immediately submerge your singed bits in ice water and slather on some aloe.

Now, you don't want to undercook your caramel. I made that mistake the first time, and while the end products were a delightful combination of chewy and melt-in-your-mouth, they oozed back together after a few days in a storage tub to become an unmanageably large block of candy.

But neither do you want to overcook it, or you'll wear out your jaw trying to chew the damn things. It's a delicate balance.

Once your goopy, syrupy mixture hits a perfect 257˚F or hard ball stage, add the remaining ingredients and pour it all into your prepped pan. Let it cool for a few hours.

Don't skimp on the foil here

Eventually it'll be cool enough to dump out onto your cutting board and slice up into logs. Score a line down the center to mark it into halves, then quarters, then eighths. Then you can actually cut through the block.

Your knife is gonna get über greasy here. I found it worked best to keep my right hand on the handle (and away from anything oily) and my left hand on top of the blade (watch those fingers), and to use a rocking motion to push the knife through the caramel, rather than trying to saw through.

I dunno what's up with those speckly ends

Caramel bokeh

Each caramel strip will yield about 10 pieces, so technically you'll end up with about 80 caramels… though I found a few of mine somehow disappeared along the way. Funny how that always happens when I bake.

For dipping the candies, you can temper the chocolate to give it a sinfully smooth and shiny luster (more on that soon), or just dunk 'em in a bowl of microwaved melted chocolate. Sprinkle on some fancy salt after they've cooled a bit but are still sticky.


Salted Chocolate-Dipped Caramels
Adapted slightly from the New York Times T Magazine

Ingredients
1 1/3 cups heavy cream (also called heavy whipping cream)
2 cups white sugar
1/2 cup light corn syrup
1/3 cup honey (buy local to avoid lead contamination!)
6 Tbsp unsalted butter, cut into ~1/2" cubes
1 tsp vanilla extract (the real deal, not imitation)
2 tsp sea salt
~1 tsp fleur de sel, pink salt, orange salt, black salt, the coolest salt you can find
1 1/2 lbs bittersweet chocolate, finely chopped (you can experiment with other types of chocolate if you like)
Vegetable oil

1.   Generously line an 8x8" pan with foil and grease it up with veggie oil.

2.   Prep the rest of your ingredients and have them easily accessible.

3.   Get out your biggest saucepan—4 quarts will do the trick nicely—and bring the cream to a boil.

4. Pour in the sugar, corn syrup, and honey. Stir, stir, stir with a clean, dry wooden spoon until the mixture comes to a rolling boil.

5. Let boil, stirring occasionally, for somewhere between 15 and 30 minutes. Keep an eye on your candy thermometer (keep it in the pan the whole time to get accurate, instant readings); when it gets close to 257˚F,  watch it, hawklike, and test to see if it's at the hard ball stage. Candy can hover for seemingly forever at one temperature before suddenly sending the mercury rocketing up, so focus.

6. As soon as it hits 257˚F or the hard ball stage, remove from heat and stir in the butter, vanilla, and sea salt. It's a good idea to wear oven mitts when you're doing this to protect against 257˚F sugar splashes.

7. When the butter has melted, pour the mixture into your greased, foil-lined pan and let it cool and solidify. If you're not going to dip the candies in chocolate (WTF is wrong with you?), sprinkle the block with your fancy salt when it's partially solid but still sticky enough to hold the grains.

8. Once it's at room temp, turn that pan upside-down to put the caramel on a cutting board. Carefully peel off the foil (wash it and reuse it!), then invert the candy block again. I'm not sure if that second inversion is reallllly necessary, but it's in the original recipe, so let's just go with it.

9. With a heavy-duty knife, score 1" thick sections in the caramel, then cut through with a rocking motion to create eight 1" logs, strips, whatever.

10. Cut each caramel log into 1" pieces (the original recipe calls for 1/2" thick pieces, but I liked the larger, square candies better).

11. Melt the chocolate in the microwave or a double boiler. Use a large fork or tongs to dip each caramel in the chocolate. Let them drip on a baking rack set over plenty of scrap paper. Sprinkle with salt after every 8-10 caramels (you don't want to salt them too soon or the grains will melt into the chocolate), and transfer the pieces to parchment paper to fully dry.

Wednesday, March 21, 2012

Hey There, Sweet Thing

The apartment next door is undergoing some serious remodeling, and you know what that means:

1. Noise, noise, and more noise

Not the best morning ever. I shot this quick video and then skedaddled to the coffee shop down the road!

2. Paint fumes and other unpleasant smells that waft in through windows thrown open to catch the warm California spring air.

To combat the first, I turn to music and earplugs. To exorcise foul odors, I turn to… the kitchen!

First, chai tea. The days may be warming up nicely, but it's still blanket weather in the evening. Thankfully, chai works seamlessly in both situations. Make a giant pot, pour it into glass jars, pop it in the fridge, and drink it chilled or warm it back up. You can't go wrong.

Chai spices, all neatly arranged

Mmm... spicy, smooth, versatile

What goes well with tea? Baked goods! How about lavender scones? I know, I know, they sounded weird to me too, but I can't stop eating these. (Recipe at the end.)


I like 'em warm with butter and jam, but there's no reason you couldn't enjoy them with…

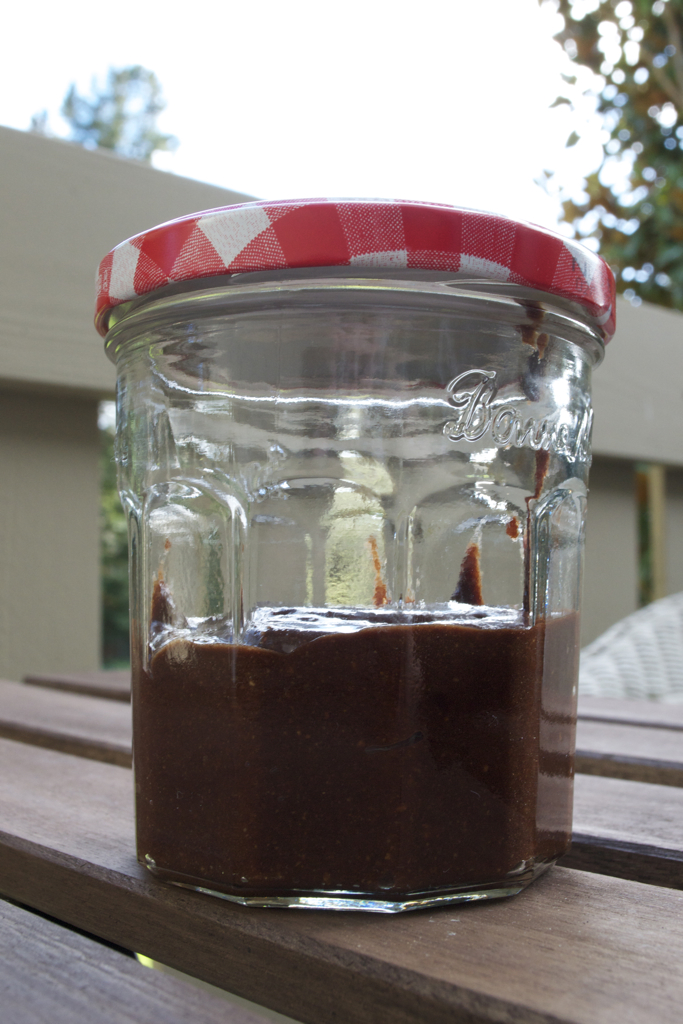
…some homemade nutella! You ever get that feeling that the world is just getting more and more complicated every damn day? I get that all the time. Take, for instance, the morning a few weeks back: I was casually sitting at the table, perfectly innocent, just having some toast, when I started reading the ingredients on a jar of Nutella. Ingredient number one: sugar (perfect start to a healthy breakfast, obviously). Number two: palm oil. Because every needs to start their day with a side of rainforest destruction and dead orangutans.

Throw some hazelnuts, cocoa powder, maple syrup, and vanilla in the food processor, though, and you've got a relatively guilt-free, vegan, and considerably healthier alternative. Here's the recipe, courtesy of Steph Chows.


If all that isn't enough to make your home smell like a little corner of paradise, it's time to pull out all the stops. LEMONS. Lots of them. Fresh from the farmers' market. Sure, you could disembowel them (erm, I mean, juice them) and make lemonade, but c'mon. We're grownups here. Why not make something with a little more pizzazz? Limoncello should fit the bill quite nicely.


Lemon stripes

A few notes on that recipe: first, you should use organic lemons. That should be a no-brainer, since you're using the peel. I'm also only making a half-recipe; I'll assume you can do the math there yourself.

The fruits of my labor. (Ouch, ouch, pun...)
Unfortunately, limoncello takes some patience. Once you zest the lemons and combine zest+vodka, the mixture's gotta stew for a good week or two at least. I'm assuming this recipe is solid, but we'll have to wait until next month to know for sure. 


All the recipes in one place: Chai   ~   Nutella   ~   Limoncello

Lavender Scones
Adapted slightly from The Cookie Book by Catherine Atkinson, Joanna Farrow, and Valerie Barrett

1.   Preheat the oven to 425˚F.
2.   Sift together 2 cups all-purpose flour and 1 Tbsp baking powder.
3.   Use a pastry blender to cut in 1/4 cup (half a stick) of butter.
4.   Stir in 3 Tbsp sugar and 1.5 tsp lavender blossoms.
5.   Pour in no more than 3/4 cup milk (cow, soy, almond, whichever).
6.   On a very, very well-floured counter or cutting board, use your flour-coated hands to pat the dough about 1/2" thick. Flip the dough over every few pats and add flour as needed to keep it from sticking.
7.   Use a round cookie cutter to stamp out some scones, and plop 'em on a greased baking sheet. Yield will vary depending on the size of your cutter; I got 8 scones out of mine.
8.   Brush the tops with milk (use your fingers if you don't have a brush. It's okay, really) and sprinkle each scone with a pinch of lavender.
9.   Bake for 10-12 minutes, until they're golden brown or you just can't wait anymore.

(Alternatively, you can make this in a food processor. Pulse the flour and baking powder briefly to mix, add the cut-up butter and pulse 4-5 times, mix in the sugar and lavender, then slowly pour in the milk with the motor running.)


P.S. Allow me to have a proud mama moment: Look! My seeds are sprouting! Look at the wee little cilantro sprouts!

Gotta love those cotyledons

Even my parsley celebrated the solstice yesterday and started perking up! Aw, look, it's still wearing its little seed party hat…

Parsley periscope

Tuesday, June 14, 2011

Basically Vegan Chocolate Cake

Having just flown home to Phoenix from a month in the frozen north, I must say I feel a bit like the hypothetical frog dropped suddenly into hot water. But instead of leaping to air-conditioned, iced tea-sipping safety, I've recklessly sought shelter in my overly warm kitchen. It's just so nice to finally return to a well-stocked pantry and familiar cooking implements. Besides, now that I'm not working 60 to 70 hours a week in the lab with zero days off, I actually have time to explore new recipes and recreate old favorites. Risotto, seitan bites, fennel tea, corn and black pepper crackers currently in the oven, and this chocolate cake in celebration of my boyfriend's promotion yesterday* at work!
 *"Currently" and "yesterday" being relative terms… I tend to write these posts over several days.

The cake is mostly vegan (you can make it 100% vegan if you like… I must disclose that I greased the pan with butter and used dairy-containing white chocolate for the topping), quick, delicious, and awesome. Obviously. I mean, we're talking about chocolate cake here. How could it not be awesome?

Equally obviously, such a cake should be paired with sufficiently awesome science. And it will be: in the next post, I'll be writing about one of my all-time-favorite scientific papers. In deference to the more squeamish among you, though, I won't pair the recipe and science directly. Ah, not that you should be worried or anything…

Just don't think about it right now. Think about… chocolate!

Most cake recipes worth their salt (or sugar) will tell you to grease and flour your baking pan. You're better off using cocoa powder instead, though, for dark cakes like this one. Use a sifter or a fine-mesh sieve, like a tea strainer, to dust that greasy pan.


If you didn't sift your dry ingredients together, use a whisk to mix 'em up. It'll break up clumps much more effectively than a wooden spoon (no offense to any such spoons out there).


Science tidbit for today: Oil and water don't mix because fats are hydrophobic. People infected with the rabies virus also exhibit hydrophobia, likely because swallowing liquids induces painful spasms in these patients. Indeed, "hydrophobia" is another term for the disease.


Don't try feeding this cake to wild animals foaming at the mouth--the rabies virus goes about its business of invading cells, conning them into replicating the virus, and bursting forth into the world in the salivary glands of those infected--and you should be safe.


Basically Vegan Chocolate Cake
Adapted from Joy of Cooking, Dairy-Free Chocolate Cake

1 1/2 cups all-purpose flour
1 heaping cup sugar
1/3 cup plus 1 Tbsp cocoa powder (unsweetened)
1 tsp baking soda
1/2 tsp salt
1 cup cold water
1/4 cup vegetable oil
1 Tbsp white vinegar
1 1/2 tsp vanilla extract
1/2 tsp almond extract (optional; use 2 tsp vanilla if you don't have almond)
Your choice of decorations

Note: As with pretty much any recipe, your cake is only gonna be as good as the ingredients you make it with. Cocoa is the star here, so please stay away from Hershey's. Both Rapunzel and Green & Black make delicious organic, fair-trade cocoa. Do the farmers who are growing your chocolate a favor and spend some extra moolah for ethically traded cocoa powder (and sugar, too, while you're at it). You expect to be paid fairly for your work, right? Why do the people who grow, harvest, and prepare your food deserve less? I know fair trade products cost more--sometimes considerably more--than their conventional counterparts, the fair trade system isn't perfect, and lots of us, myself included, certainly can't afford to buy everything fair trade… but please consider making an effort to get at least some of your groceries fair trade or ethically traded.

1.   Grease an 8x8" square pan (preferably glass) and dust with cocoa powder. Preheat your oven to 375˚F.

2.   Sift or whisk together the dry ingredients (flour through salt) in a large bowl.

3.   Stir together the wet ingredients (water through almond extract) in a separate bowl or measuring cup. Make a well in the dry ingredients, pour in the wet ones, and stir until smooth and mostly free of clumps.

4.   Pour the batter into the prepared pan, using a spatula to even out the top.

5.  Bake for 30 min. The cake is done when a toothpick or knife stabbed in the center comes out non-goopy.

6. Once the cake has cooled, decorate it to your heart's content. I opted for melted white chocolate splattered on with a spoon à la Jackson Pollock and topped with red sprinkles, but you could dust it with powdered sugar (try cutting out a stencil or paper snowflake, but don't make the design too fine), frost it, glaze it, whatever you like.